In this step-by-step guide, we will walk you through the process of replacing the spark plug on a snow blower gas machine. By following these instructions, you will be able to ensure that your snow blower is functioning optimally and ready to tackle the winter weather. With a little bit of guidance and some simple tools, you can easily replace the spark plug and keep your snow blower running smoothly. So let’s get started!
Top-rated gas snow blowers


Step 1: Gather the necessary tools and materials
Before starting the replacement process, you will need the following tools and materials:
- A wrench: This tool will be used to loosen and tighten bolts during the spark plug replacement. Ensure that the wrench size matches the size of the bolts on your vehicle.
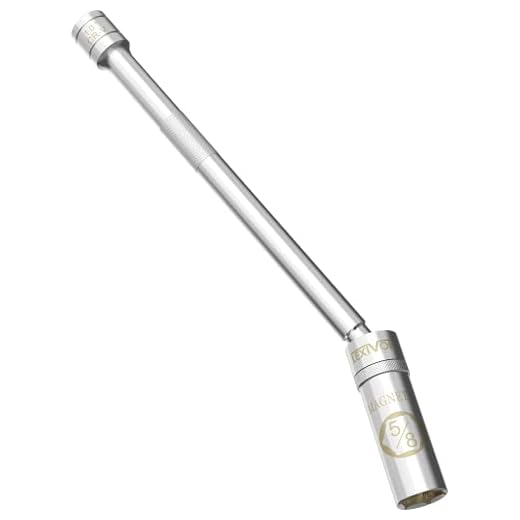
- A socket set: This set includes various sizes of sockets and a ratchet handle. Use the appropriate socket size to remove the spark plug.
- A spark plug socket: This specialized socket specifically fits over the spark plug to remove it from the cylinder head. It has a rubber or magnetic insert to securely hold the spark plug during removal or installation.
- A new spark plug: It is essential to have a new spark plug that matches the specifications recommended by your vehicle’s manufacturer. Ensure that it is the correct type and heat range for your engine.
- Safety gloves: Wearing safety gloves will protect your hands from any potential injuries or burns during the spark plug replacement process. It is important to prioritize your safety while working on your vehicle.
Having these tools and materials ready before you begin the replacement process will ensure a smoother and more efficient spark plug replacement.


Step 2: Turn off the snow blower and disconnect the spark plug wire
To ensure safety, it is crucial to turn off the snow blower and disconnect the spark plug wire. This prevents accidental starting and potential harm to the user. Simply locate the snow blower’s on/off switch and turn it to the “off” position. Once done, locate the spark plug wire, which is usually located near the engine, and carefully disconnect it by firmly gripping the boot and pulling it off. These two steps will guarantee that the snow blower is completely shut down and minimize any risks.
Step 3: Locate the spark plug
To locate the spark plug on your snow blower, start by identifying the engine’s cylinder head. Typically, the spark plug is situated on this part. If you’re having trouble finding it, consult your snow blower’s manual for guidance. Following the instructions provided in the manual should help you easily locate the spark plug and proceed with the necessary maintenance tasks.


Step 4: Remove the old spark plug
To remove the old spark plug, use a socket set or spark plug socket. Carefully loosen and remove the spark plug from the cylinder head. Be cautious to avoid damaging any surrounding components.
Step 5: Inspect the old spark plug
Step 5: Inspect the old spark plug
Examine the old spark plug for signs of wear or damage. Check for worn electrodes, excessive carbon deposits, or a cracked insulator. If you notice any of these issues, it is essential to replace the spark plug promptly.
For example:
- Worn electrodes: Look for visible signs of erosion or thinning on the metal part at the end of the spark plug.
- Excessive carbon deposits: Check for black, sooty, or oily residue on the spark plug, which can impede its performance.
- Cracked insulator: Inspect the porcelain portion of the spark plug for any cracks or chips that could affect its functionality.
Remember, if you find any of these problems during the inspection, it is recommended to replace the old spark plug to ensure optimal performance of your equipment.


Step 6: Check the gap on the new spark plug
To check the gap on the new spark plug, start by obtaining a gap gauge or referring to the specifications provided by the snow blower’s manufacturer. Hold the spark plug firmly using a spark plug wire tool. Place the gauge between the center electrode and the ground electrode, then carefully bend the ground electrode until the desired gap is achieved. Use the gauge to verify the gap and adjust as needed. For example, if the manufacturer specifies a gap of 0.030 inches, ensure that the gauge fits snugly between the electrodes with no resistance. If the gap is too small, gently increase it by carefully bending the ground electrode outwards with a gap gauge. Conversely, if the gap is too large, gently decrease it by carefully bending the ground electrode inwards.
Step 7: Install the new spark plug
To install the new spark plug, first, carefully insert it into the cylinder head. Gently hand-tighten the spark plug until it is snug, making sure not to overtighten it. Then, use a socket set or spark plug socket to tighten it further. For example, insert the socket over the spark plug and turn it clockwise until it is fully tightened. Remember to be cautious not to overtighten, as this can cause damage to the threads.
Step 8: Reconnect the spark plug wire
To reconnect the spark plug wire, first, locate the new spark plug. Then, position the spark plug wire over the top of the spark plug and gently push it down until it fits securely onto the spark plug. Make sure there are no gaps or looseness between the wire and the spark plug. This will ensure a proper connection and optimal performance of the spark plug.
Step 9: Start the snow blower and test the spark plug
To start the snow blower, follow these steps:
- Ensure that the snow blower is positioned on a flat, stable surface.
- Set the choke to the “cold start” position and engage the throttle to the “fast” or “full” position, depending on the model.
- Locate the spark plug on the engine. It is usually situated near the front or top of the engine and has a black wire and boot connected to it.
- With caution, connect the spark plug tester to the spark plug wire. This tester allows you to observe the spark plug’s functionality without the risk of electrical shock.
- Once the tester is securely connected, pull the starter cord or press the electric starter button to start the snow blower.
- As the engine runs, pay attention to its operation. Listen for a smooth and steady sound, indicating proper functioning.
- Direct your attention to the spark plug tester. Observe if there is a strong, visible spark occurring at the tip of the spark plug. A weak or no spark could indicate an issue with the ignition system.
- If you notice a weak or no spark, consult the snow blower’s manual or contact a professional for further troubleshooting and repairs.
Remember to take all necessary safety precautions and refer to the specific instructions provided by the snow blower manufacturer.
Step 10: Dispose of the old spark plug and clean up
- Dispose of the old spark plug in accordance with local regulations. Check with your local waste management or recycling center for specific instructions on how to properly dispose of the old spark plug. It is important to follow these regulations to ensure proper handling and disposal of potentially hazardous materials.
- Clean up any debris or tools used during the replacement process. Use a shop towel or a brush to remove any dirt, grease, or other residues from the surrounding area. Make sure to gather and properly store any tools or equipment used, ensuring they are in their designated place for future use. Taking the time to clean up not only maintains a safe and tidy work environment, but also helps to prolong the lifespan of your tools.
Key Takeaways
To sum up, replacing the spark plug on a snow blower gas machine is an essential maintenance task that should not be overlooked. By regularly checking and replacing the spark plug, users can optimize the machine’s performance and extend its lifespan. Following the steps outlined in this blog post will help users confidently replace the spark plug and continue to rely on their snow blower for effective snow removal.
Necessary Equipment


Maintenance Tips
How to Replace the Spark Plug on a Snowblower
Instructions for using a gas-powered snow blower
- Familiarize yourself with the equipment: Read the owner’s manual of your snow blower carefully to understand its specifications, features, and safety instructions
- Choose the correct gasoline: Most snow blowers require unleaded gasoline with an octane rating of 87 or higher. Avoid using gasoline ethanol blends higher than 10% as it can damage the engine
- Fueling the snow blower: Locate the fuel tank, which is usually near the engine, and ensure that the snow blower is turned off. Remove the fuel cap, insert the gas nozzle, and fill the tank. Be cautious not to overfill
- Avoid spillage: Always use a funnel or a gas can with a self-venting nozzle to minimize the risk of spilling gas. Spills can not only be dangerous but can also damage the machine’s components
- Store gasoline properly: Use an approved gasoline container with a tight-fitting lid. Store the container in a well-ventilated, cool area, away from direct sunlight and any sources of ignition, such as heaters or garage tools


