To properly align a thin kerf miter saw blade, follow these steps:
- Safety first: Ensure that the miter saw is turned off and unplugged before starting any adjustments.
- Check the blade’s alignment: Inspect the blade visually and look for any signs of misalignment, such as wobbling or uneven cutting.
- Adjust the bevel angle: If necessary, adjust the bevel angle of the saw according to the manufacturer’s recommendations.
- Adjust the miter angle: Similarly, adjust the miter angle to ensure accurate cuts.
- Fine-tune the blade: Use a square or other alignment tool to check the blade’s perpendicularity to the saw’s table. Make adjustments as needed to achieve a perfect 90-degree angle.
- Blade parallelism: Measure the distance between the blade and the miter slot at both the front and back of the table. The measurements should be the same. If not, adjust the saw’s trunnion screws to achieve parallelism.
- Test the alignment: With the saw turned off, make a test cut on a scrap piece of wood. Check for any irregularities or deviations from the desired cut.
- Repeat if necessary: If the alignment is still not accurate, repeat the adjustment process until the desired alignment is achieved.
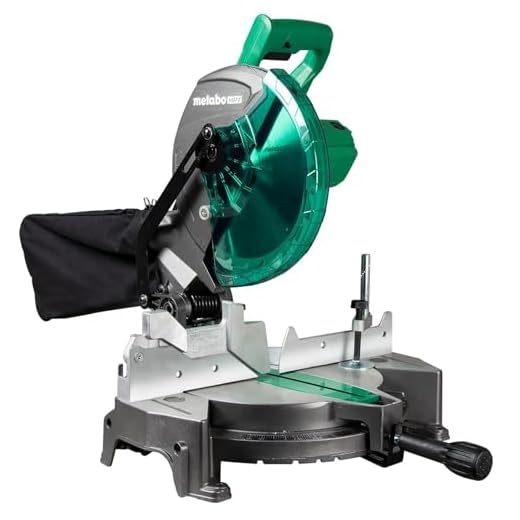
Top-Rated Miter Saw Blades for Precision Cuts


Gather the necessary tools and materials
Before starting the alignment process, gather the necessary tools and materials:
- Miter saw: Ensure you have a miter saw available for making precise cuts.
- Thin kerf blade: Use a thin kerf blade with your miter saw for clean and accurate cuts.
- Combination square: Have a combination square on hand for measuring and marking angles with accuracy.
- Wrench or Allen key for blade adjustments: Use a wrench or Allen key to adjust the blade on your miter saw as needed.
- Personal protective equipment: Remember to wear safety glasses and gloves for your safety while operating the miter saw.


Ensure the miter saw is turned off and unplugged
When working with power tools such as a miter saw, safety should be the top priority. Before proceeding to align the blade, it is crucial to ensure that the miter saw is turned off and completely unplugged from the power source. This step helps eliminate any potential hazards and reduces the chances of accidental activation while working on the saw.
Loosen the blade arbor nut
To loosen the blade arbor nut, follow these steps:
- Locate the wrench or Allen key that corresponds to the nut size.
- For example, if the nut is a 5/8-inch nut, use a 5/8-inch wrench.
- Insert the wrench or Allen key onto the nut.
- Ensure it is securely in place to prevent slipping.
- Turn the wrench or Allen key counterclockwise to loosen the nut.
- Apply steady pressure but avoid applying excessive force.
- Loosen the nut enough so that the blade can be removed, but keep it threaded on the arbor.
- Avoid completely removing the nut as it is necessary for retaining the blade securely.
- Once the nut is loosened, you can safely remove the blade or proceed with other maintenance tasks as needed.
Remember to exercise caution when working with power tools and ensure the equipment is turned off and unplugged before attempting any blade-related adjustments.


Inspect the blade for any damage or dullness
- Examine the blade closely for any observable indications of harm or bluntness.
- If you notice any signs of damage or dullness on the blade, it is crucial to replace it before moving forward with the alignment procedure.
- Replace the blade promptly to ensure optimal functionality and safety during the alignment process.
Align the blade with the miter saw fence
- Place a combination square against the miter saw fence.
- Adjust the blade’s position until it is parallel to the fence.
- Ensure that the blade is aligned with the combination square for accurate cuts.
- This alignment is crucial in achieving precise and clean cuts with your miter saw.


Check the blade's alignment with the miter saw table
To check the alignment of the blade with the miter saw table, place a combination square against the miter saw table. Adjust the position of the blade until it is square to the table. This will ensure that the blade is perpendicular to the workpiece, resulting in accurate cuts.
Tighten the blade arbor nut
- Align the blade properly.
- Use the wrench or Allen key to tighten the blade arbor nut securely.
- Verify that the blade is still aligned after tightening.
Perform a test cut and make further adjustments if necessary
To perform a test cut, align and secure the blade first. Next, take a scrap piece of wood and make a cut. Inspect the cut to ensure accuracy. If needed, make further adjustments to the blade or any other relevant settings.
Summary of Key Points
In summary, properly aligning a thin kerf miter saw blade is essential for achieving accurate and precise cuts. By carefully following the steps outlined in this blog post, you can ensure that your miter saw blade is aligned correctly. This attention to detail will result in improved woodworking outcomes and a more efficient cutting experience.
Necessary Equipment


Expert Advice
Step-by-Step Guide on Aligning the Blade of DeWalt Miter Saw
Getting the most out of your Thin Kerf Miter Saw Blades
- Ensure safety: Before using the thin kerf miter saw blade, make sure you are wearing proper safety equipment such as safety goggles, hearing protection, and gloves
- Blade selection: Choose the appropriate thin kerf miter saw blade for your specific application. Different blades are designed for cutting different materials, so select one that suits your needs
- Correct installation: Ensure the blade is securely installed on the miter saw. Follow the manufacturer’s instructions for mounting the blade correctly. Double-check that the blade is tightened properly and aligned with the saw’s arbor
- Adjustments: Set the miter saw to the desired angle and bevel for your intended cut. Familiarize yourself with the adjustment controls and locking mechanisms on your particular miter saw model
- Cutting technique: When using a thin kerf miter saw blade, it is important to push the material through the blade at a steady pace. Avoid forcing the cut, as this can cause the blade to bind or kickback. Allow the blade to do the work, and maintain control throughout the entire cutting process
- Maintenance: After each use, clean the blade of any debris or buildup that may affect its performance. Inspect the blade for any signs of damage or dullness, and replace it if necessary. Proper storage of the blade is also essential to prevent accidental damage
- Remember, always read the manufacturer’s instructions and follow all safety guidelines when using any power tool or a thin kerf miter saw blade
Frequently Asked Questions about Thin Kerf Miter Saw Blades
Are there any safety precautions to be aware of when using a thin kerf miter saw blade?
Yes, there are several safety precautions to be aware of when using a thin kerf miter saw blade. Here are some key points to consider:
- Read the manufacturer’s instructions: Before using the thin kerf miter saw blade, carefully read and follow the instructions provided by the manufacturer. These instructions often highlight specific safety precautions and guidelines.
- Wear appropriate personal protective equipment (PPE): To protect yourself from potential hazards, always wear necessary PPE, such as safety glasses, hearing protection, and gloves. Additionally, consider wearing a dust mask or respirator to minimize inhalation of dust particles.
- Secure workpiece properly: Ensure that the workpiece is securely clamped or held in place before starting any cutting operation. This reduces the risk of the material shifting during the cut, which could lead to kickback or other accidents.
- Check the blade condition: Inspect the thin kerf miter saw blade for any signs of damage or dullness before use. A damaged or dull blade may result in improper cuts, increased friction, and potential accidents. Replace or repair any damaged blades promptly.
- Adjust blade depth and angle: Properly set the blade depth and angle according to the material being cut. Ensure that the settings are appropriate for the task at hand and avoid overloading the blade, which can cause excessive strain and potential hazards.
- Use the saw’s safety features: Modern miter saws usually come with safety features like blade guards, anti-kickback devices, and electronic brakes. Familiarize yourself with these features and ensure they are properly maintained and functional during use.
- Maintain a clean work area: Regularly clean the work area from debris, sawdust, or any other clutter that may hinder safe operation. Sawdust accumulation can impair visibility and contribute to accidents, so clean it up periodically.
- Exercise caution during blade changes: When replacing or changing the thin kerf miter saw blade, make sure the power is disconnected or switched off, and follow proper procedures to safely handle the blade. Be cautious of sharp edges, and handle the blade with protective gloves or a blade-changing tool.


